Membership Settings: Quotas and Member Tickets
Overview
The membership system helps organisations track individual contributions to ticket sales. Rather than treating all sales as anonymous transactions, memberships let you see who sold what and whether they met their targets.
At its simplest, memberships answer one question: How many tickets has each person in our organisation sold?
Who uses this: Organisation administrators who need to track member contributions and manage sales quotas.
Key capabilities:
- Enable memberships for your organisation
- Create member types to categorise different groups (committee, standard, youth)
- Add individual members with email addresses
- Set sales quotas per member type for each event
- Track progress and balances owed
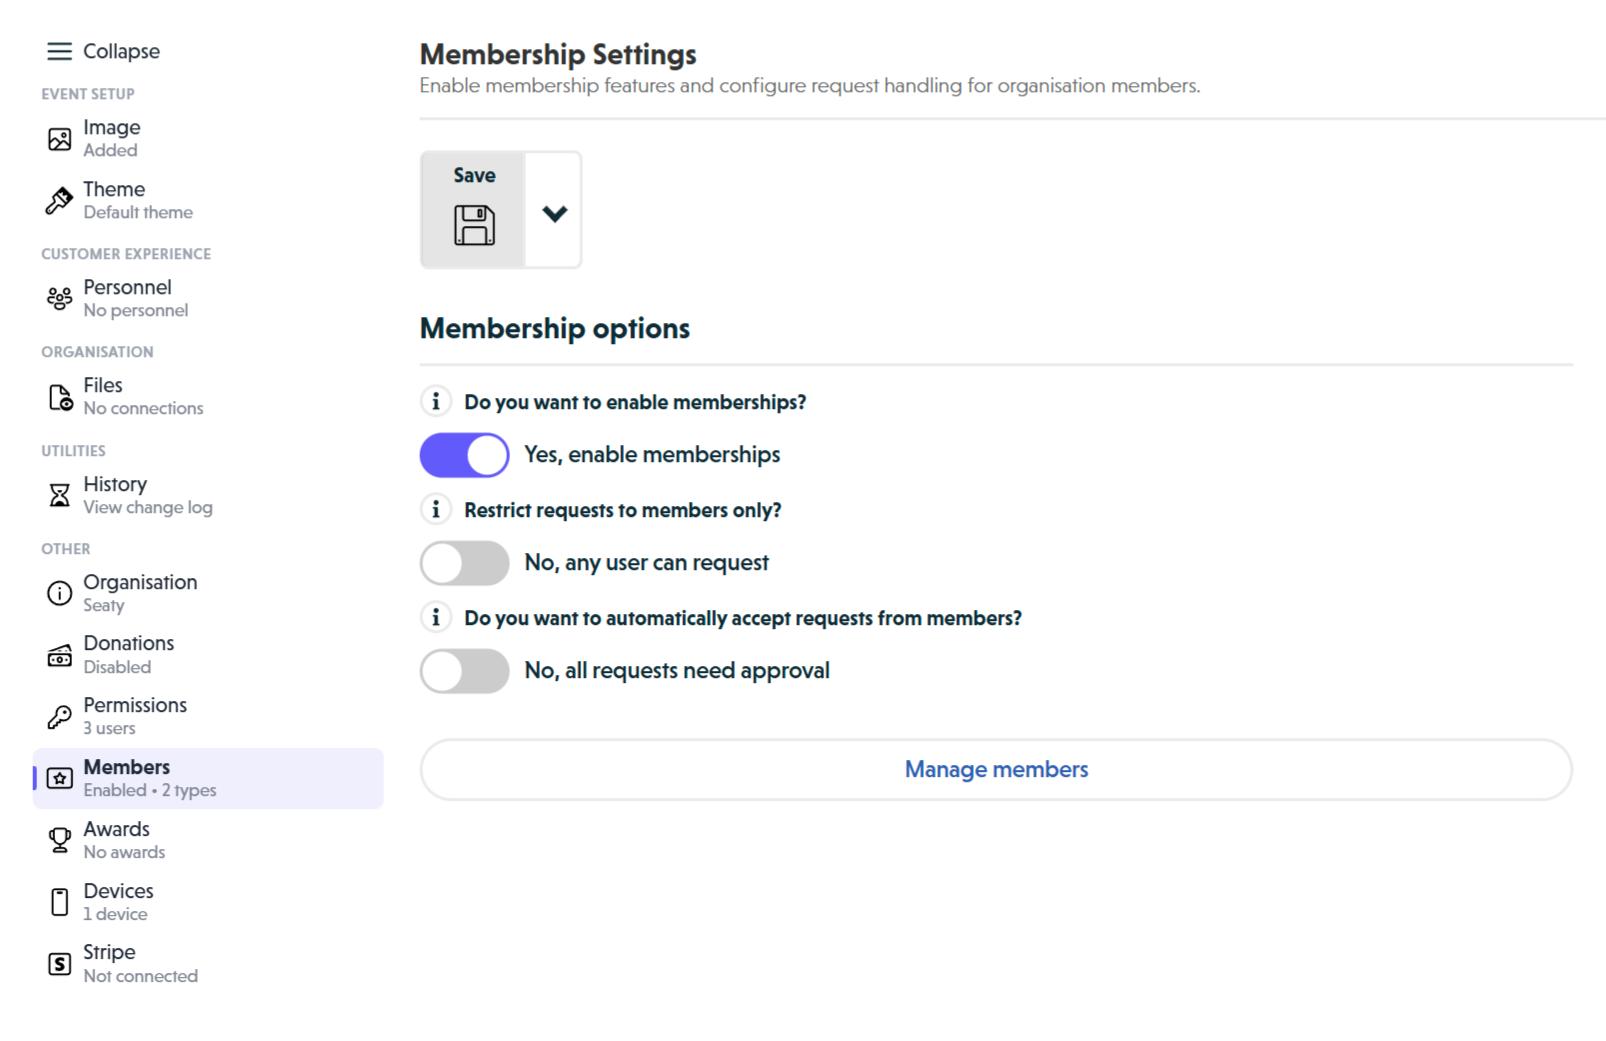 Membership Settings showing enable toggle, restrict requests toggle, auto-accept toggle, and Manage members button
How It Works
At a glance: Enable memberships, create member types, add members, set quotas per event, then track sales progress.
1. Enable memberships for your organisation
Before you can add members, you need to turn on the membership system. This unlocks the member management features and allows you to configure how ticket requests work for members.
2. Set up member types
Member types categorise your members into groups. Each type can have different quota expectations. For example, committee members might be expected to sell more tickets than new members.
3. Add your members
Members are people in your organisation who will sell tickets. Each member needs an email address (for identification) and gets assigned to a member type.
4. Configure quotas for each event
Quotas are event-specific. For each event, you set how many tickets you expect members of each type to sell. This allows different targets for different shows.
5. Track progress and collect balances
As members request tickets, their progress shows against their quota. You can see who is meeting targets and who owes money for tickets they have sold.
Think of it this way:
- Memberships turn on the tracking system
- Member types define your categories and expectations
- Members are the individuals doing the selling
- Quotas set targets for each event
- Balances show progress and money owed
Enabling Memberships
To enable the membership system for your organisation:
- Navigate to your organisation's admin menu
- Select "Edit Organisation"
- In the left menu, select "Membership"
- Toggle "Do you want to enable memberships?" to Yes
- Save your changes
Once enabled, you can access member management and configure additional options.
Membership Configuration Options
When memberships are enabled, you can configure two additional settings:
Restrict requests to members only
- When enabled: Only members can request tickets without immediate payment
- When disabled: Anyone can request tickets for approval
Why restrict to members? If your organisation relies on members to sell tickets, this ensures only recognised members can defer payment.
Automatically accept requests from members
- When enabled: Member ticket requests are approved immediately and added to their balance
- When disabled: All requests require manual admin approval
Why use auto-accept? Trusted members can process sales faster without waiting for approval. Their balance updates automatically.
Member Types
Member types categorise your members into groups with different expectations. They are organisation-wide and apply across all your events.
Common Examples
- Committee Member - Leadership roles with higher sales expectations
- Standard Member - Regular participating members
- Youth Member - Younger members with lower quota requirements
- Associate Member - Supporting members with no sales obligation
Creating Member Types
- Navigate to your organisation's admin menu
- Select "Members" from the menu
- Click "Member Types"
- Click "Add member type"
- Enter a descriptive name
- Save
Managing Member Types
From the Member Types screen, you can:
- View all member types and how many members each has
- Edit member type names
- Delete member types (members become unassigned but remain in the system)
Note: You must have at least one member type. The system prevents deletion of the last remaining type.
Adding Members
Members are managed at the organisation level and recognised across all your events.
Adding Individual Members
- Navigate to your organisation's admin menu
- Select "Members"
- Click "Add member"
- Enter member details:
- Name - Display name for the member
- Email address - Used for identification and login
- Member type - Select from your organisation's member types
- Save
Granting Membership from Orders
When viewing an attendee's details from Orders and Payments:
- Click the "Membership" section
- Click "Grant membership"
- The member is created using their order email and name
- Select their member type
- Save changes
Why grant membership this way? When someone purchases tickets and you want them to become a member, this is faster than manually entering their details.
Managing Existing Members
From the Members screen, you can:
- Search members by name or email
- Filter by member type
- Edit member details
- Change member types
- Remove members
Setting Quotas
Quotas are sales targets set per member type for each event. They help track whether members are meeting expectations.
Understanding Quotas
A quota is the number of tickets you expect members of a specific type to sell for a particular event.
Example:
- Committee Member: 20 tickets
- Standard Member: 10 tickets
- Youth Member: 5 tickets
- Associate Member: 0 tickets (no sales expectation)
Setting Quotas for an Event
- Navigate to your event's admin menu
- Click "Edit" on your event
- In the left menu, select "Members"
- Enter a quota number for each member type
- Save your changes
Note: The Members section only appears in the event editor if memberships are enabled for your organisation.
Quota Strategy
Start realistic - Consider what members can reasonably achieve based on their networks and the event's appeal.
Use tiers - Leadership roles typically have higher quotas; new or younger members have lower quotas.
Adjust per event - Popular shows may warrant higher quotas; smaller or experimental productions may need lower targets.
Tracking Member Performance
Viewing Balances
From the Orders and Payments screen for each event:
- Select your event
- Navigate to the "Balances" tab
- View each member's:
- Name and member type
- Quota target
- Tickets sold
- Money owed from ticket requests
- Progress percentage
Filtering and Sorting
You can filter and sort member balances by:
- Member type
- Tickets sold
- Balance owed
- Quota achievement
Exporting Reports
Export member performance data for:
- Financial reconciliation
- Performance analysis
- Recognition programmes
- Historical tracking
Member Benefits
Members receive several advantages when the membership system is enabled.
Ticket Requesting
Members can:
- Request tickets without immediate payment
- Pay later according to your organisation's process
- Track their balance and quota progress
Non-members must:
- Pay immediately with card payment
- Cannot defer payment
File Access
If file sharing is enabled for your organisation or event:
Members can access:
- Marketing materials for promoting events
- Production information
- Promotional images and content
Members see a message confirming their membership and buttons to access available files.
Use Cases
Theatre Group with Selling Members
Scenario: Amateur theatre group where cast members sell tickets
Setup:
- Member Types: "Performer" (quota 12), "Crew" (quota 6)
- Auto-accept requests: Enabled for trusted members
- Member files: Marketing materials for promotion
Benefit: Performers sell tickets to friends and family, tracked against their quota. They pay the organisation after collecting from buyers.
Club with Supporter Scheme
Scenario: Sports club with supporter memberships
Setup:
- Member Types: "Player" (quota 10), "Supporter" (quota 5)
- Member-only requests: Enabled for early access
Benefit: Players and supporters get first access to tickets before public sale.
Community Organisation
Scenario: Community centre with volunteer helpers
Setup:
- Member Types: "Volunteer", "Committee", "Patron"
- Different quotas per type
- Auto-accept requests: Disabled for approval control
Benefit: Volunteers help promote events while committee oversees allocation. Patrons support without sales requirements.
Common Questions
Enabling Memberships
Why can I not see the Members section in the event editor?
Memberships must be enabled at the organisation level first. Go to Organisation > Edit > Membership and toggle memberships on.
Can I disable memberships after enabling them?
Yes. Existing members remain in the system but membership features become hidden.
Member Management
What happens when I delete a member type?
Members assigned to that type become unassigned. They remain members but without a type until you reassign them.
Can someone be a member of multiple organisations?
Yes. Membership is per-organisation. The same email can be a member of different organisations.
What if a member's email address changes?
Edit the member record and update their email address. Their history remains associated with the updated record.
Quotas and Tracking
What if a member does not meet their quota?
Nothing automatic happens. Quotas are targets for tracking purposes. How you handle members who miss quotas is your organisation's decision.
Do quotas carry over between events?
No. Quotas are set per event. Each event starts fresh.
Can I change quotas after the event starts?
Yes. You can adjust quotas at any time during the event.
Ticket Requests
Why can a non-member not request tickets?
If "Restrict requests to members only" is enabled, non-members must pay immediately. Disable this setting if you want anyone to request tickets.
What happens when auto-accept is enabled?
Member requests are approved immediately. The tickets appear on their balance and they receive confirmation straight away.
Need help? Contact support at support@seaty.co.uk for assistance with membership configuration.